Go to Analytics.google.com and enter your Gmail username and password. (If you do not have a Gmail account, follow the instructions HERE).
Assuming you do not have an Analytics account associated with your email, you will see this:
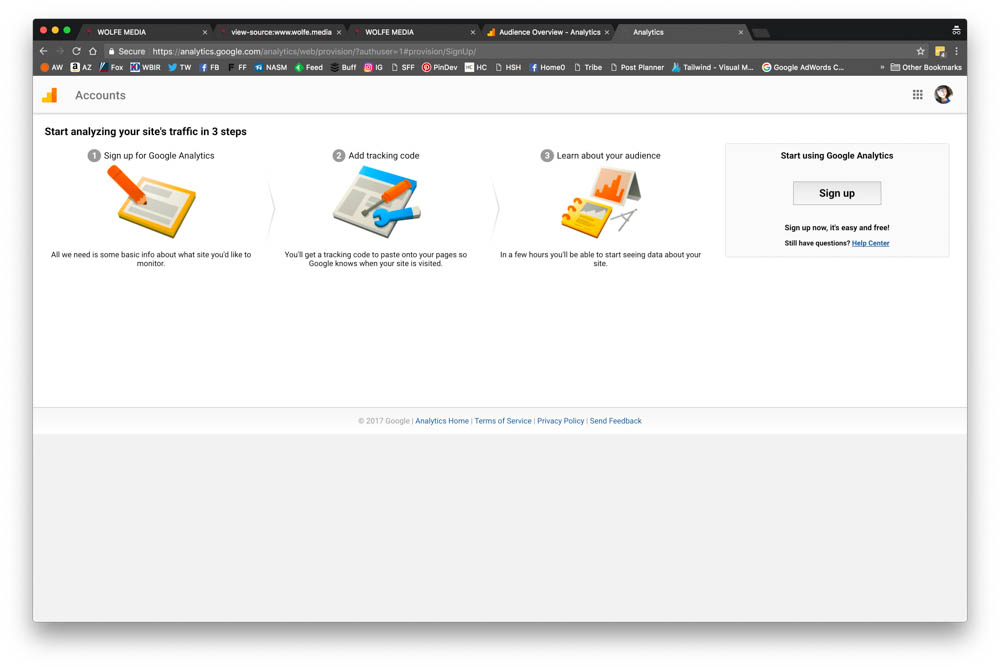
Click on Sign Up.
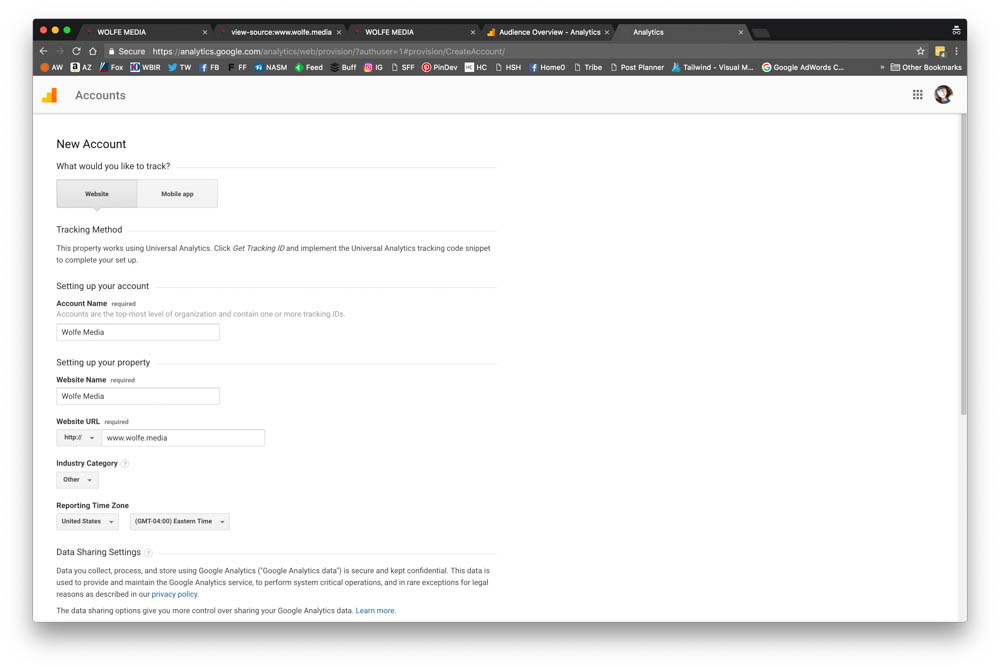
Select Website.
Enter the following (I am showing you best practices):
Select your Industry Category. (Most of you will probably need to select Other.)
Select your Time Zone.
Click Get Tracking ID.
Read through the Terms of Service and Click I Accept.
Leave this tab open.
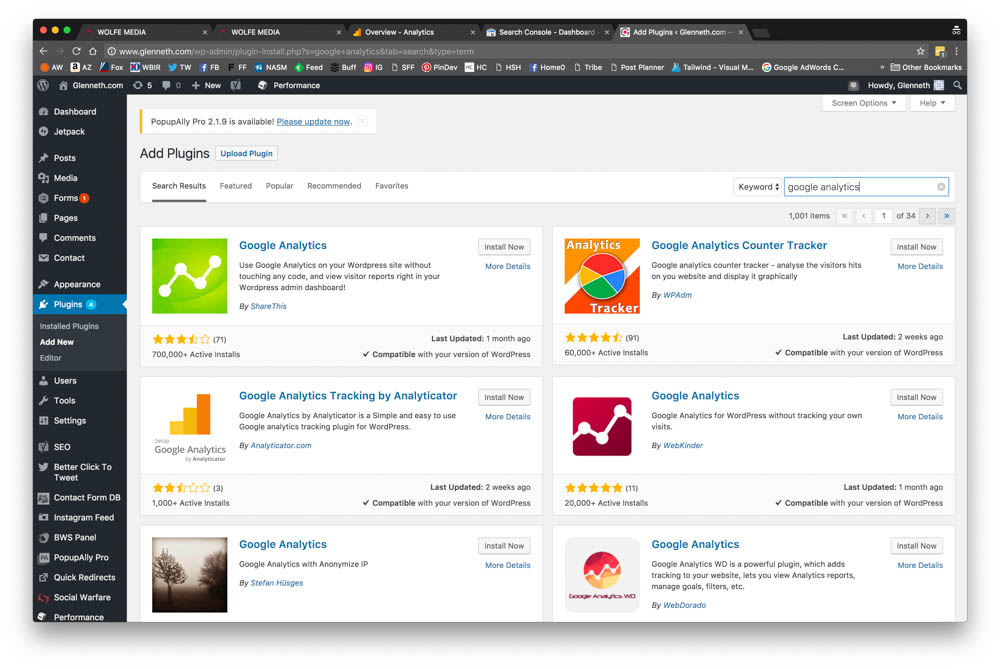
In a new tab, login to your WordPress Website.
Go to Plugins / Add New.
Search for “Google Analytics.”
Choose the one that is shown in the upper left-hand corner of this photo.
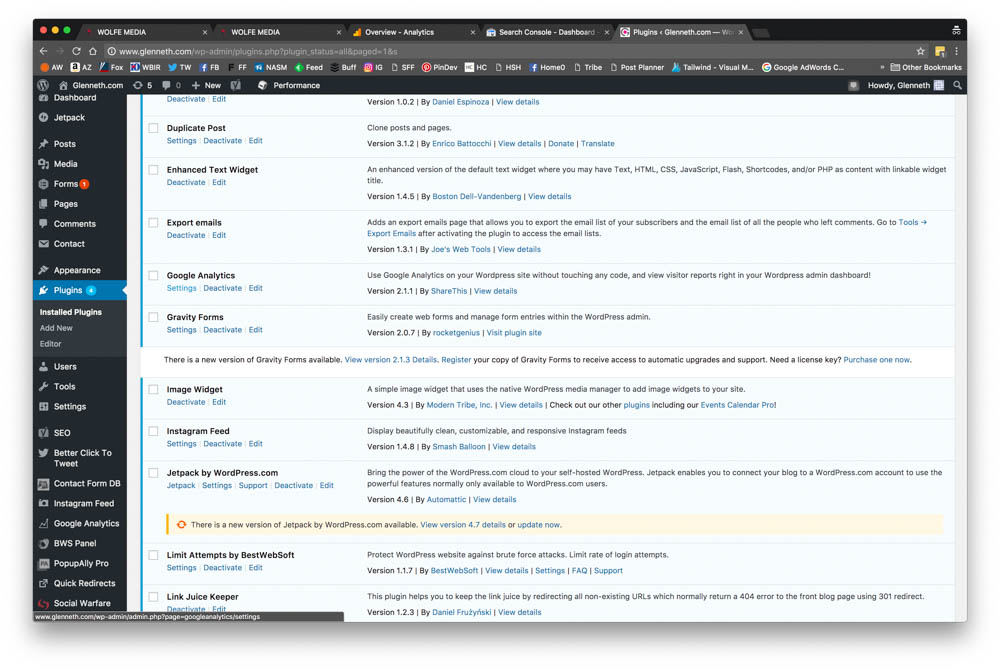
Click Install Now. Once installed, click Activate.
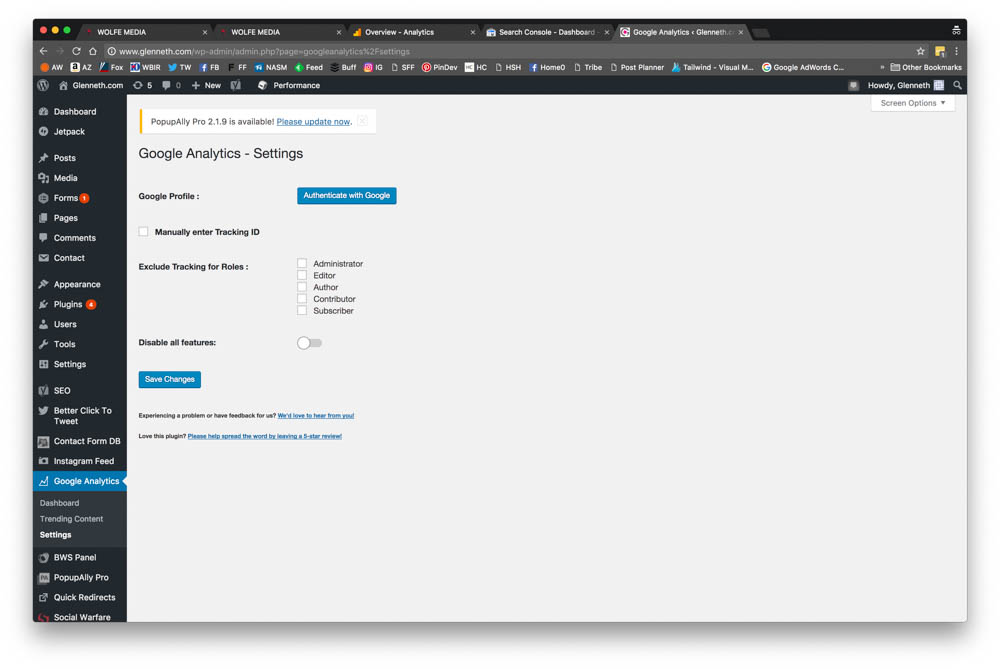
Find the plugin and click Settings.
Click authenticate with Google.
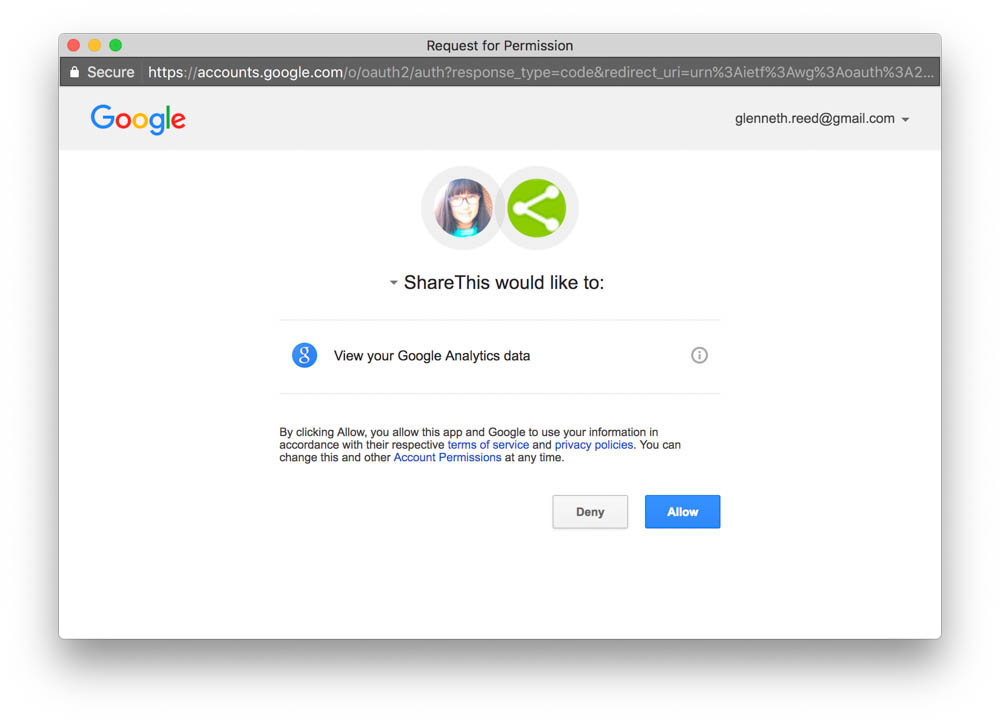
Choose your Google account (if multiple accounts appear).
Click Allow.
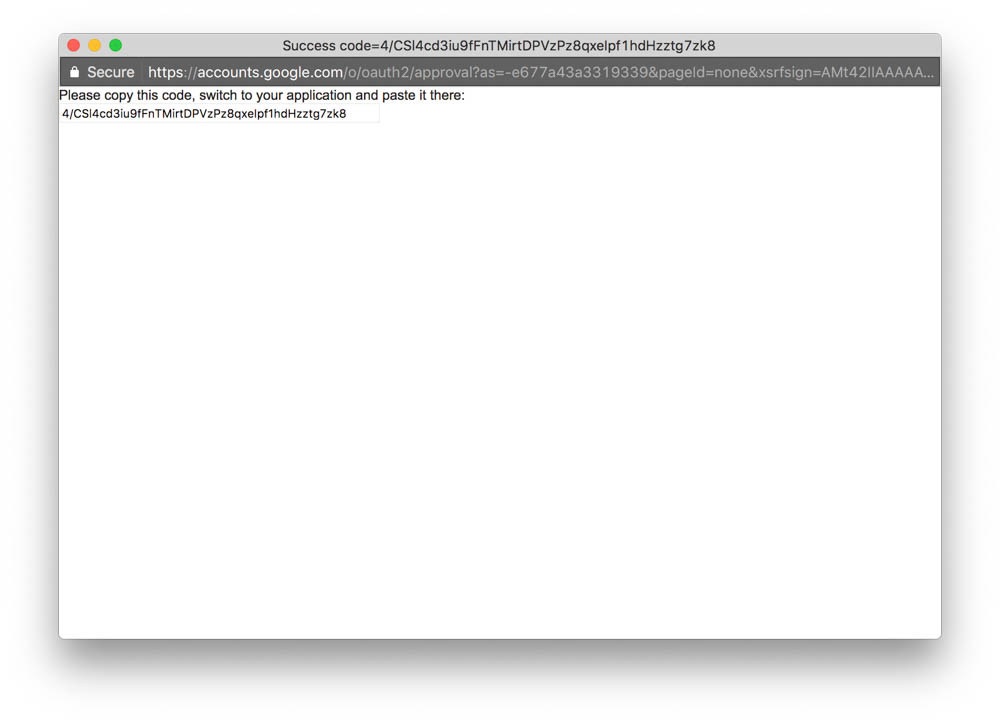
Copy and paste the code shown . . .
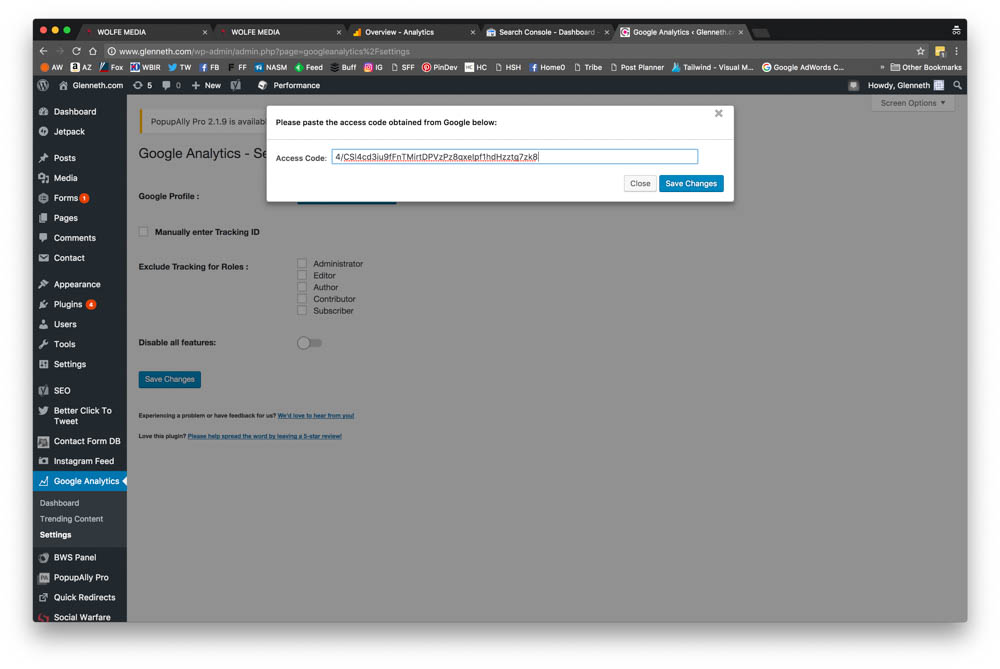
. . . into the box. Then, click Save Changes.
If the appropriate account does not appear, use the dropbox to select the correct one. Then, click Save Changes.
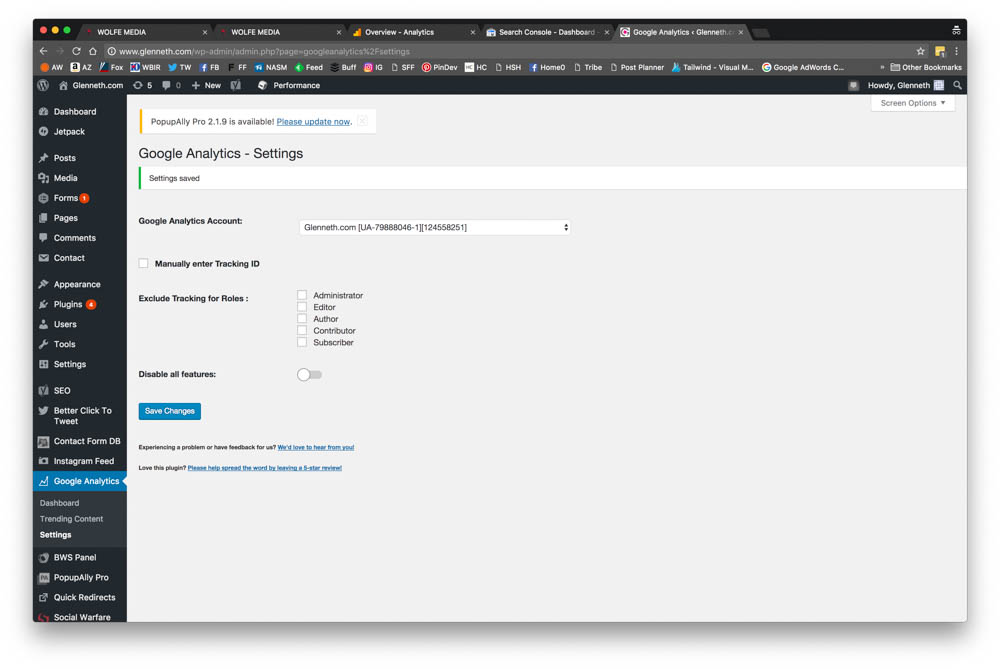
You have now installed Google Analytics on your WordPress website.
Please note that typically the BEST way to install Google Analytics is through the adding code to your header file. Since all websites are built differently, I wanted to make sure we didn’t break anything, so using a plugin is the second best option.
